We used a speed of 30 and power of 100 to get these results with our laser engraver.
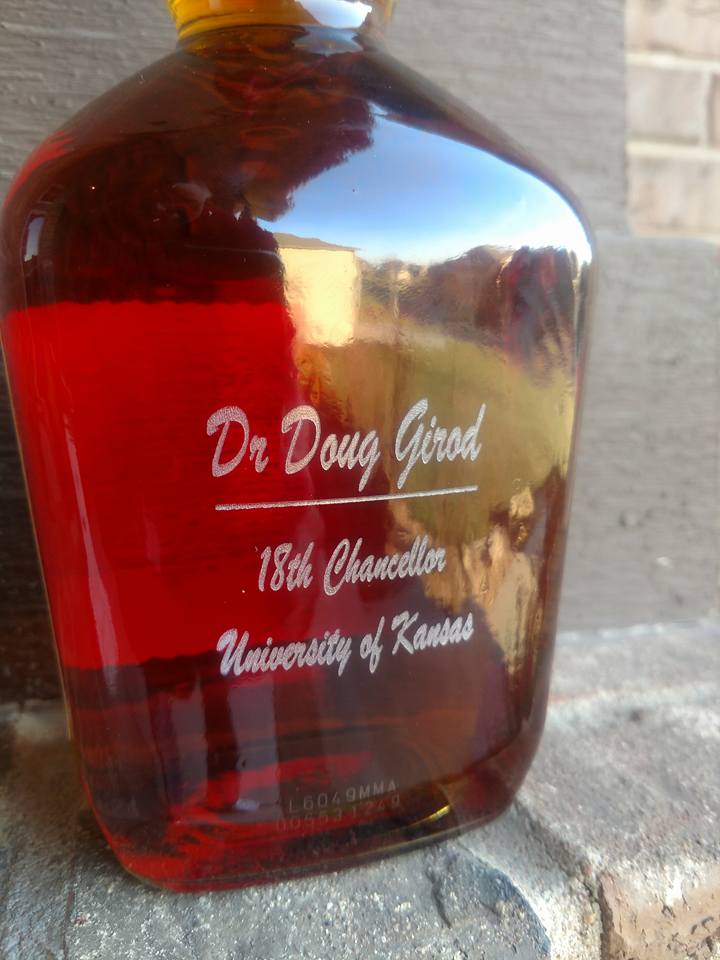
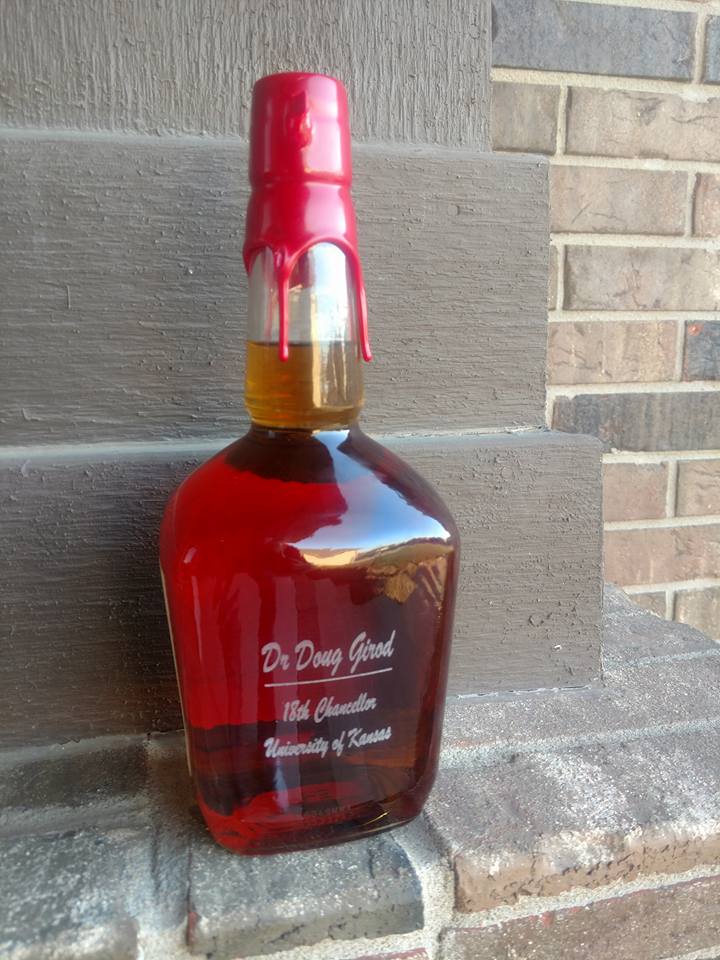
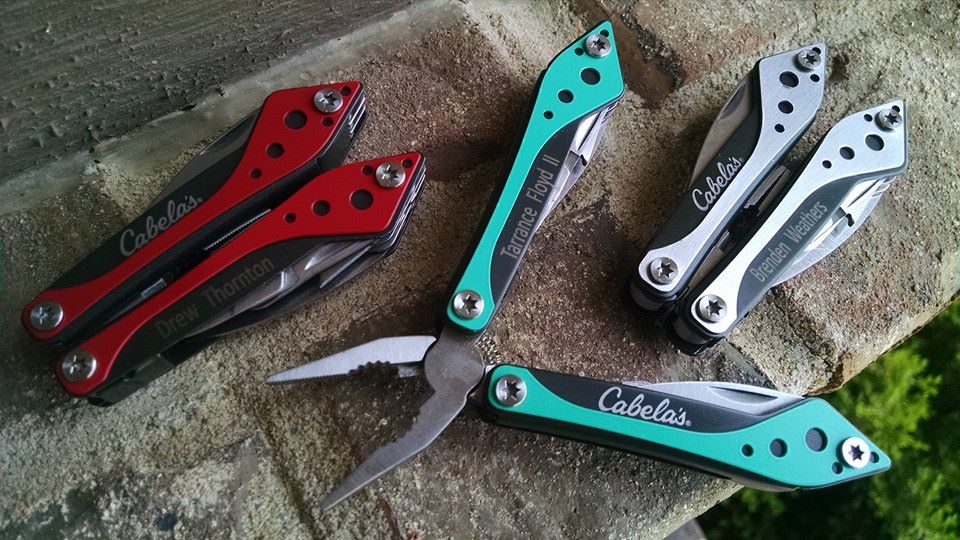
Here is a fun gift we did with a bottle of Makers Mark. Simple text engraving on the back looks outstanding and it makes a unique fun gift. The natural color of the liquor combined with the frosty white engraving really pops off and looks nice.
We used a speed of 30 and power of 100 to get these results with our laser engraver.
0 Comments
What a wild and crazy couple of months we have had here at MBJD Laser leading up to Christmas. It is always amazing to us how incredibly busy we get with personal one of a kind Christmas jobs. Here are a few we have done in the last couple of days that we hope you find ineresting.
The upper left photo shows a bamboo cutting board that our customer wanted an old family go to recipe for Potato Dumblings. Although it doesn't look like much in the photograph in our opinion what makes it so special is the hand written signature of the grandmother. We made 9 total and they turned out fabulous. The upper right photo is a wooden boat oar. This was tough to do simply because it was to large to fit in our laser. We worked some magic to make this gem happen. Basically we masked the entire oar, lasered it, then black paint filled the engraving to get the dark black / stand off look. The lower left project with the baby feet was one of our favorites. Our customer needed a gift for a baby shower and bought this white granite piece for us to work with. After about a month of planning, they decided on a prayer, and they also wanted a copy of the birth certificate footprints as well. The hardest part was scanning the footprints into photoshop and working the the prints over so that we could get a good laser image for our machine. Similar to the oar we masked the entire piece, lasered it, and finally paint filled with black paint. Amazing look!! The bottom right are some new style wine tumblers. These are not hard to do, just shown here to show a new style that are becoming very popular. Lastly the bottom picture of the stainless steel plate was a lot of fun. We always enjoy making special pieces on new substrates. We actually used cermark for this piece and the final product as you can see was stunning. We did 2 plates total. Each plate weighed 15 lbs each and was 18" x 12". Fun project! This past week I saw a post on another Laser website about someone who created their own LED name badges for Lanyards. I liked the basic design / idea and thought I'd try to develop something on my own.
I had some left over LED's from a previous project and decided to use them for the project. In the pictures below I used a lanyard from a conference I attended. It really didn't matter to me what the lanyard had on it, this project was more about creating the name badge using acrylic and a small LED light. As you can see in the pictures, the LED we used had the capability of fading into about 3 different colors creating a fun and unique look. I bought the LED from this website if you are interested. http://www.extremeglow.com/store/p/32-Button-Body-Lights.aspx These LED's last up to 8 hrs before they need to be changed. There are to many details involved to explain the entire project but in a nutshell I designed the acrylic piece to accept the LED light using AutoCAD. With a few measurements and engineering we engineered 7 pieces of acrylic to fit nicely together around the LED light. 5 of the pieces were clear acrylic and 2 of the pieces were black. All in all it was a fun project and it turned out well. Today we did a fun little project with guitar picks. Small, fast, easy, and the best part is they laser engraved very nicely. Sometimes the projects that look the best and create the most bang for the buck are the little ones. These wood guitar picks are only limited to your imagination. Got us to thinking that drum sticks might be next! :-)
Sometimes we laser engrave things at MBJD Laser, just because we can. Its fun to try out simple projects with ordinary things that we have laying around. These are standard #2 pencils that we put a few quotes on. They are fun, inexpensive, and handy. They make great conversation pieces. Use your imagination and have fun customizing some #2 pencils. Ever since our opening we get requests to laser engrave on pocket knives and multitools. These make excellent gifts and generally laser engrave very nicely. The obvious question we get when someone calls is can you laser engrave on ___________? Our response is always we will need to see the item to know what we can and cant do but I would say the majority of the time we can get the job done.
You can see from the following pictures that they all turn out different. From a jet black color to a frosty white, it all depends what the substrate is made of. We not only engrave on the handles but have the capability of lasering on the stainless steel blades as well. Probably the most popular items for Groomsman gifts at our shop have been pocket knives. They really make classy gifts in a price range that most people can afford. One of our steady products that we engrave here at MBJD Laser are Wedding Cake Server Sets. Although we do not sell these in our store we have a wedding contact who sells these on Amazon and we fulfill all of his wedding orders. The great part about lasering on these stainless steel sets is the amazing black look once they are engraved. Flute sets and Server sets are very popular.
Just as an FYI we welcome locals to bring us their wedding items to be engraved. We have done Bridesmaids and Groomsman gifts ranging from Yeti's to Pocket Knives. We are always surprised at what our customers bring us but we welcome any project you might have. Today we had fun engraving names on Farkle Dice Cups. Although it was a fun and colorful job to do we were a bit nervous as to how the laser would respond to the cups. The cups didn't seem to be 100% leather and that is always a concern. As you can see from the picture they turned out amazing.
We used the suggested setting for leather. Speed 100, Power of 35. Before doing any job that our customer supplies the substrate we always make sure that the customer knows that the outcome is uncertain and there is a chance that we ruin their product. Of course, here at MBJD Laser we do our best at taking the guess work out of the equation but even our best educated guesses are wrong. Some of the best projects we have done we had to take a gamble on such as this one. I'm going to start today's blog post off by saying, I'm sorry for the quality of these photos. If you have ever photographed glass before you know how difficult it is to get a great shot without glare etc.
Anyway, one of our steady items that we engrave daily are Toasting Flutes for weddings. Typically, it is a 2 line engraving with the Bride and Groom names as well as wedding date. The contrast of the engraving is very elegant and looks very classy on the flutes. The frosty white engraving makes for a great keepsake and we get many compliments on this style of flutes. As engraving goes there are lots of things to consider when lasering toasting flutes. Diameter of glass, thickness of glass, font choice, and focal length are all critical. Most cups, tumblers, coffee mugs, and flutes get clamped down to the rotary attachment for engraving. On these flutes however we have found that gravity works great and does a superb job. The 2 things I would tell other engravers to make sure of when lasering toasting flutes is to always re-focus the laser after EVERY glass. You would be surprised how different each and every glass is. The focal length is super important. The second thing is to make sure that your laser beam is as perpendicular as it can be to the surface of the glass to give you the engraving that you are expecting. The depending on the curvature of the toasting flute this can sometimes cause issues. We used a Speed 30, Power 100 on our 40 Watt Zing. |
Brian Huber
|